




















 D. Cardoso












NEUE GENERATION
SPORT-APP
Live-Ergebnisse, aktuellste Statistiken und
mehr auf OFFSIDE!
Mito Hollyhock - Yokohama F Marinos 1-0 beendet. Tore, Aufstellungen, Statistiken, Tabelle und Wettquoten bei Offside Scores. (18.03.2026) Dieses Spiel gehört zu Japan - J-League, J1 League 2026, East - Spieltag 7. Spielort: K's denki Stadium Mito, Mito, Japan.
 FUSSBALL
114
FUSSBALL
114
 BASKETBALL
0
BASKETBALL
0
 VOLLEYBALL
3
VOLLEYBALL
3
 TENNIS
11
TENNIS
11
Mito Hollyhock - Yokohama F Marinos 1-0 beendet. Tore, Aufstellungen, Statistiken, Tabelle und Wettquoten bei Offside Scores. (18.03.2026) Dieses Spiel gehört zu Japan - J-League, J1 League 2026, East - Spieltag 7. Spielort: K's denki Stadium Mito, Mito, Japan.
 18.03.2026
 Japan - J-League, J1 League 2026, East - Spieltag 7
 K's denki Stadium Mito, Mito, Japan
 H. Shimizu






 Heimform Mito Hollyhock
Auswärtsform Yokohama F Marinos
Heimform Mito Hollyhock
Auswärtsform Yokohama F Marinos
| Mito Hollyhock | Yokohama F Marinos | |
|---|---|---|
| %64 |
|
%36 |
| 15 |
|
5 |
| 3 |
|
1 |
| 423 (%77) |
|
165 (%58) |
| 11 |
|
9 |
| 0 |
|
3 |
| 3 |
|
4 |
| 1 |
|
0 |
| 0 |
|
0 |
| 4 |
|
10 |
| Mito Hollyhock | Yokohama F Marinos | |
|---|---|---|
| 15 |
|
5 |
| 3 |
|
1 |
| 5 |
|
3 |
| 7 |
|
1 |
| 0 |
|
0 |
| Mito Hollyhock | Yokohama F Marinos | |
|---|---|---|
| 544 |
|
281 |
| 423 (%77) |
|
165 (%58) |
| 29 (%34) |
|
29 (%37) |
| 8 (%40) |
|
4 (%30) |
| Mito Hollyhock | Yokohama F Marinos | |
|---|---|---|
| 12 |
|
22 |
| 11 |
|
15 |
| 19 |
|
32 |
| Mito Hollyhock | Yokohama F Marinos | |
|---|---|---|
| 59 (%50) |
|
57 (%49) |
| 5 (%45) |
|
3 (%30) |
| 184 |
|
171 |
| Mito Hollyhock | Yokohama F Marinos | |
|---|---|---|
| %71 |
|
%29 |
| 9 |
|
1 |
| 2 |
|
0 |
| 278 (%82) |
|
59 (%51) |
| 4 |
|
5 |
| 0 |
|
1 |
| 2 |
|
1 |
| 0 |
|
0 |
| 0 |
|
0 |
| 1 |
|
6 |
| Mito Hollyhock | Yokohama F Marinos | |
|---|---|---|
| 9 |
|
1 |
| 2 |
|
0 |
| 2 |
|
1 |
| 5 |
|
0 |
| 0 |
|
0 |
| Mito Hollyhock | Yokohama F Marinos | |
|---|---|---|
| 335 |
|
114 |
| 278 (%82) |
|
59 (%51) |
| 16 (%30) |
|
13 (%24) |
| 6 (%42) |
|
0 (%0) |
| Mito Hollyhock | Yokohama F Marinos | |
|---|---|---|
| 6 |
|
10 |
| 2 |
|
9 |
| 6 |
|
16 |
| Mito Hollyhock | Yokohama F Marinos | |
|---|---|---|
| 28 (%54) |
|
23 (%45) |
| 2 (%33) |
|
0 (%0) |
| 86 |
|
74 |
| Mito Hollyhock | Yokohama F Marinos | |
|---|---|---|
| %58 |
|
%42 |
| 6 |
|
4 |
| 1 |
|
1 |
| 145 (%69) |
|
106 (%63) |
| 7 |
|
4 |
| 0 |
|
2 |
| 1 |
|
3 |
| 1 |
|
0 |
| 0 |
|
0 |
| 3 |
|
4 |
| Mito Hollyhock | Yokohama F Marinos | |
|---|---|---|
| 6 |
|
4 |
| 1 |
|
1 |
| 3 |
|
2 |
| 2 |
|
1 |
| 0 |
|
0 |
| Mito Hollyhock | Yokohama F Marinos | |
|---|---|---|
| 209 |
|
167 |
| 145 (%69) |
|
106 (%63) |
| 13 (%41) |
|
16 (%69) |
| 2 (%33) |
|
4 (%33) |
| Mito Hollyhock | Yokohama F Marinos | |
|---|---|---|
| 6 |
|
12 |
| 9 |
|
6 |
| 13 |
|
16 |
| Mito Hollyhock | Yokohama F Marinos | |
|---|---|---|
| 31 (%47) |
|
34 (%52) |
| 3 (%60) |
|
3 (%50) |
| 98 |
|
97 |
| Schuss-Statistiken | Aufs Tor | Tore | Gesamt |
|---|---|---|---|
 Mito Hollyhock
|
1
|
1
|
2
|
 Mito Hollyhock
|
1
|
0
|
2
|
 Mito Hollyhock
|
0
|
0
|
2
|
 Mito Hollyhock
|
0
|
0
|
2
|
 Yokohama F Marinos
|
0
|
0
|
2
|
| Beste Spieler | Gesamt |
|---|---|
|
Mito Hollyhock
|
7.90
|
 Mito Hollyhock
|
7.70
|
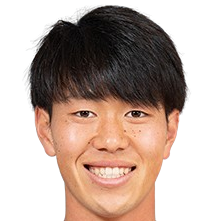 Mito Hollyhock
|
7.40
|
 Mito Hollyhock
|
7.20
|
 Mito Hollyhock
|
7.10
|
| Schlüsselpässe | Vorlagen | Gesamt |
|---|---|---|
|
Mito Hollyhock
|
0
|
2
|
|
Mito Hollyhock
|
0
|
2
|
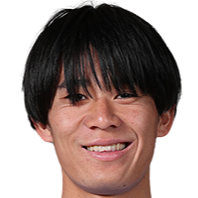 Yokohama F Marinos
|
0
|
2
|
|
Mito Hollyhock
|
0
|
1
|
 Mito Hollyhock
|
0
|
1
|
| Pass-Statistiken | Erfolgreich | Prozent | Gesamt |
|---|---|---|---|
|
Mito Hollyhock
|
85
|
83%
|
102
|
|
Mito Hollyhock
|
71
|
87%
|
81
|
|
Mito Hollyhock
|
52
|
77%
|
67
|
 Mito Hollyhock
|
37
|
84%
|
44
|
|
Mito Hollyhock
|
35
|
89%
|
39
|
| Flanken | Erfolgreich | Prozent | Gesamt |
|---|---|---|---|
|
Mito Hollyhock
|
3
|
37%
|
8
|
 Yokohama F Marinos
|
1
|
20%
|
5
|
|
Mito Hollyhock
|
3
|
75%
|
4
|
|
Mito Hollyhock
|
2
|
66%
|
3
|
|
Mito Hollyhock
|
0
|
0%
|
2
|
| Lange Bälle | Erfolgreich | Prozent | Gesamt |
|---|---|---|---|
 Yokohama F Marinos
|
16
|
50%
|
32
|
 Mito Hollyhock
|
3
|
17%
|
17
|
|
Mito Hollyhock
|
7
|
50%
|
14
|
|
Mito Hollyhock
|
5
|
38%
|
13
|
 Yokohama F Marinos
|
4
|
36%
|
11
|
| Dribblings | Erfolgreich | Prozent | Gesamt |
|---|---|---|---|
|
Mito Hollyhock
|
2
|
66%
|
3
|
|
Yokohama F Marinos
|
2
|
66%
|
3
|
 Yokohama F Marinos
|
0
|
0%
|
3
|
|
Mito Hollyhock
|
1
|
50%
|
2
|
|
Mito Hollyhock
|
1
|
50%
|
2
|
| Zweikämpfe | Erfolgreich | Prozent | Gesamt |
|---|---|---|---|
|
Mito Hollyhock
|
11
|
45%
|
24
|
 Yokohama F Marinos
|
13
|
68%
|
19
|
 Yokohama F Marinos
|
2
|
15%
|
13
|
|
Mito Hollyhock
|
6
|
50%
|
12
|
|
Mito Hollyhock
|
6
|
54%
|
11
|
| Klärungen | Gesamt |
|---|---|
|
Yokohama F Marinos
|
9
|
|
Yokohama F Marinos
|
9
|
|
Mito Hollyhock
|
7
|
|
Mito Hollyhock
|
5
|
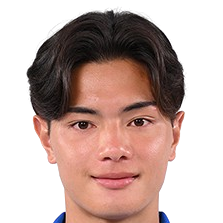 Yokohama F Marinos
|
5
|
| Geblockte Schüsse | Gesamt |
|---|---|
|
Mito Hollyhock
|
1
|
|
Mito Hollyhock
|
1
|
|
Mito Hollyhock
|
1
|
|
Mito Hollyhock
|
1
|
|
Mito Hollyhock
|
1
|
| Abgefangene Bälle | Gesamt |
|---|---|
|
Mito Hollyhock
|
5
|
|
Mito Hollyhock
|
3
|
|
Yokohama F Marinos
|
3
|
 Yokohama F Marinos
|
2
|
|
Yokohama F Marinos
|
2
|
| Tacklings | Gesamt |
|---|---|
|
Mito Hollyhock
|
7
|
|
Yokohama F Marinos
|
7
|
|
Yokohama F Marinos
|
3
|
|
Yokohama F Marinos
|
2
|
|
Yokohama F Marinos
|
2
|
| Ballverluste | Gesamt |
|---|---|
|
Mito Hollyhock
|
25
|
|
Yokohama F Marinos
|
23
|
|
Mito Hollyhock
|
20
|
|
Mito Hollyhock
|
19
|
|
Yokohama F Marinos
|
19
|
| Ballverluste durch Gegner | Gesamt |
|---|---|
|
Mito Hollyhock
|
4
|
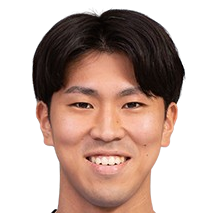 Mito Hollyhock
|
3
|
|
Mito Hollyhock
|
2
|
 Mito Hollyhock
|
2
|
 Yokohama F Marinos
|
2
|
| Abseits | Gesamt |
|---|---|
 Yokohama F Marinos
|
2
|
|
Yokohama F Marinos
|
1
|
| Fouls | Gesamt |
|---|---|
|
Mito Hollyhock
|
2
|
|
Yokohama F Marinos
|
2
|
|
Mito Hollyhock
|
1
|
|
Mito Hollyhock
|
1
|
|
Mito Hollyhock
|
1
|
| Gefoult worden | Gesamt |
|---|---|
|
Mito Hollyhock
|
3
|
|
Mito Hollyhock
|
2
|
|
Yokohama F Marinos
|
2
|
|
Yokohama F Marinos
|
2
|
|
Yokohama F Marinos
|
2
|
Mito Hollyhock
Yokohama F Marinos
Yokohama F Marinos
Yokohama F Marinos
Yokohama F Marinos
Yokohama F Marinos
Yokohama F Marinos
Yokohama F Marinos
Yokohama F Marinos
Yokohama F Marinos
Yokohama F Marinos
Japan - J-League, J1 League 2026, East - Spieltag 7
| # | Team | Sp | S | U | N | +/- | TD TD | Punkte Pkt | Form | |
|---|---|---|---|---|---|---|---|---|---|---|
|
1
|
18 | 13 | 4 | 1 | 29 - 9 | 20 | 45 |
G G G G G
|
||
|
2
|
18 | 9 | 6 | 3 | 28 - 16 | 12 | 37 |
G M G G M
|
||
|
3
|
18 | 8 | 8 | 2 | 23 - 19 | 4 | 37 |
G G G M G
|
||
|
4
|
18 | 7 | 4 | 7 | 23 - 27 | -4 | 28 |
M G M G G
|
||
|
5
|
18 | 7 | 4 | 7 | 19 - 25 | -6 | 28 |
M M M G M
|
||
|
6
|
18 | 7 | 4 | 7 | 25 - 18 | 7 | 25 |
G G G M M
|
||
|
7
|
18 | 6 | 2 | 10 | 28 - 29 | -1 | 20 |
M M M M G
|
||
|
8
|
18 | 6 | 1 | 11 | 21 - 24 | -3 | 20 |
M M G G G
|
||
|
9
|
18 | 2 | 8 | 8 | 19 - 35 | -16 | 18 |
G M M M M
|
||
|
10
|
18 | 3 | 3 | 12 | 18 - 31 | -13 | 12 |
M G M M M
|
| # | Team | Sp | S | U | N | +/- | TD TD | Punkte Pkt | Form | |
|---|---|---|---|---|---|---|---|---|---|---|
|
1
|
9 | 8 | 1 | 0 | 14 - 2 | 12 | 26 |
G G G G G
|
||
|
2
|
9 | 5 | 2 | 2 | 10 - 12 | -2 | 19 |
G G G G M
|
||
|
3
|
9 | 4 | 3 | 2 | 9 - 10 | -1 | 18 |
M G G G G
|
||
|
4
|
9 | 4 | 3 | 2 | 14 - 10 | 4 | 17 |
M G G M G
|
||
|
5
|
9 | 4 | 2 | 3 | 15 - 18 | -3 | 16 |
G M G G G
|
||
|
6
|
9 | 4 | 0 | 5 | 13 - 10 | 3 | 12 |
M M M G G
|
||
|
6
|
9 | 3 | 3 | 3 | 13 - 10 | 3 | 12 |
M M G G M
|
||
|
8
|
9 | 2 | 4 | 3 | 10 - 13 | -3 | 12 |
G M M M M
|
||
|
9
|
9 | 2 | 2 | 5 | 11 - 15 | -4 | 8 |
M M M M M
|
||
|
10
|
9 | 2 | 2 | 5 | 17 - 24 | -7 | 8 |
G M M M M
|
| # | Team | Sp | S | U | N | +/- | TD TD | Punkte Pkt | Form | |
|---|---|---|---|---|---|---|---|---|---|---|
|
1
|
9 | 5 | 3 | 1 | 14 - 6 | 8 | 20 |
G G G G M
|
||
|
2
|
9 | 5 | 3 | 1 | 15 - 7 | 8 | 19 |
G G M G G
|
||
|
3
|
9 | 4 | 5 | 0 | 14 - 9 | 5 | 19 |
G G M G M
|
||
|
4
|
9 | 4 | 1 | 4 | 12 - 8 | 4 | 13 |
M M G G M
|
||
|
5
|
9 | 4 | 0 | 5 | 17 - 14 | 3 | 12 |
M G G M G
|
||
|
6
|
9 | 3 | 2 | 4 | 17 - 17 | 0 | 12 |
G M M M G
|
||
|
7
|
9 | 2 | 2 | 5 | 9 - 13 | -4 | 9 |
G M M M G
|
||
|
8
|
9 | 2 | 1 | 6 | 8 - 14 | -6 | 8 |
G M M M G
|
||
|
9
|
9 | 0 | 4 | 5 | 9 - 22 | -13 | 6 |
M G M G M
|
||
|
10
|
9 | 1 | 1 | 7 | 9 - 16 | -7 | 4 |
M M M G M
|